Notis is built around a simple idea: any software has three parts — a database, business logic, and a user interface. Notion gives you the database and the logic; Notis gives you the interface and the AI runtime. Together, any Notion database becomes its own AI agent.
1. Design your database
Create a Notion database with the properties your workflow needs. Think about what data each entry must capture for the agent to do its job — title, status, dates, files, relations to other databases.
A “Blog Posts” database might have:
- Title — the post title
- Status — Draft / Researching / Ready / Published
- Hero image — file/media property
- Sources — rich text or relation to a Bookmarks database
- Outline — rich text
A “Bug Reports” database might have:
- Title — short summary
- Severity — Low / Medium / High / Critical
- Steps to reproduce — rich text
- Screenshot — file/media
- Linked feature — relation to Features database
2. Add your business logic
Add custom logic directly inside Notion by writing instructions in:
- The database description — overall behavior. “This is the blog content database. When a new entry is created, perform a deep search on the topic, fill the Sources field, and generate a hero image.”
- The description of each property — per-field rules. On the Hero Image property: “Always generate a 1536x1024 landscape image with our brand color #24D366.” On the Outline property: “Use H2 sections only — no H3 or deeper.”
This turns each database into a self-documenting AI agent. Notis re-reads the descriptions on every interaction, so changes take effect immediately.
See Database and property instructions for the full reference and examples.

3. Choose your interface
Trigger the agent from any channel — WhatsApp, Telegram, email, Slack, voice — or run it on autopilot with Automations.
Examples that combine all three layers:
“Create a new blog post about how Notis differs from custom GPTs, with research and a hero image.” — Triggered by chat. The Blog Posts database description tells Notis to deep-search, source, and illustrate before saving.
“Every Monday at 9 AM, generate a weekly digest from this week’s Tasks and post it to my Notes database.” — Triggered by a scheduled automation.
“When a new row is added to the Bug Reports database, run a triage prompt and assign a severity.” — Triggered by a Notion webhook.
Start small. Build one database with one rule in its description, see how Notis handles it, then layer in property-level instructions. The instructions you write today become the spec the AI follows tomorrow.
Trigger Notis from Notion via webhook
Notion’s built-in automations can call any HTTPS URL when a database row changes — that’s exactly what a Notis webhook automation is. Pair them and you get a Notion database that runs Notis on every status change, new row, or property edit.
Create a webhook automation in Notis first (chat or portal — see Automations) and copy its webhook URL. Then, on the Notion side:
-
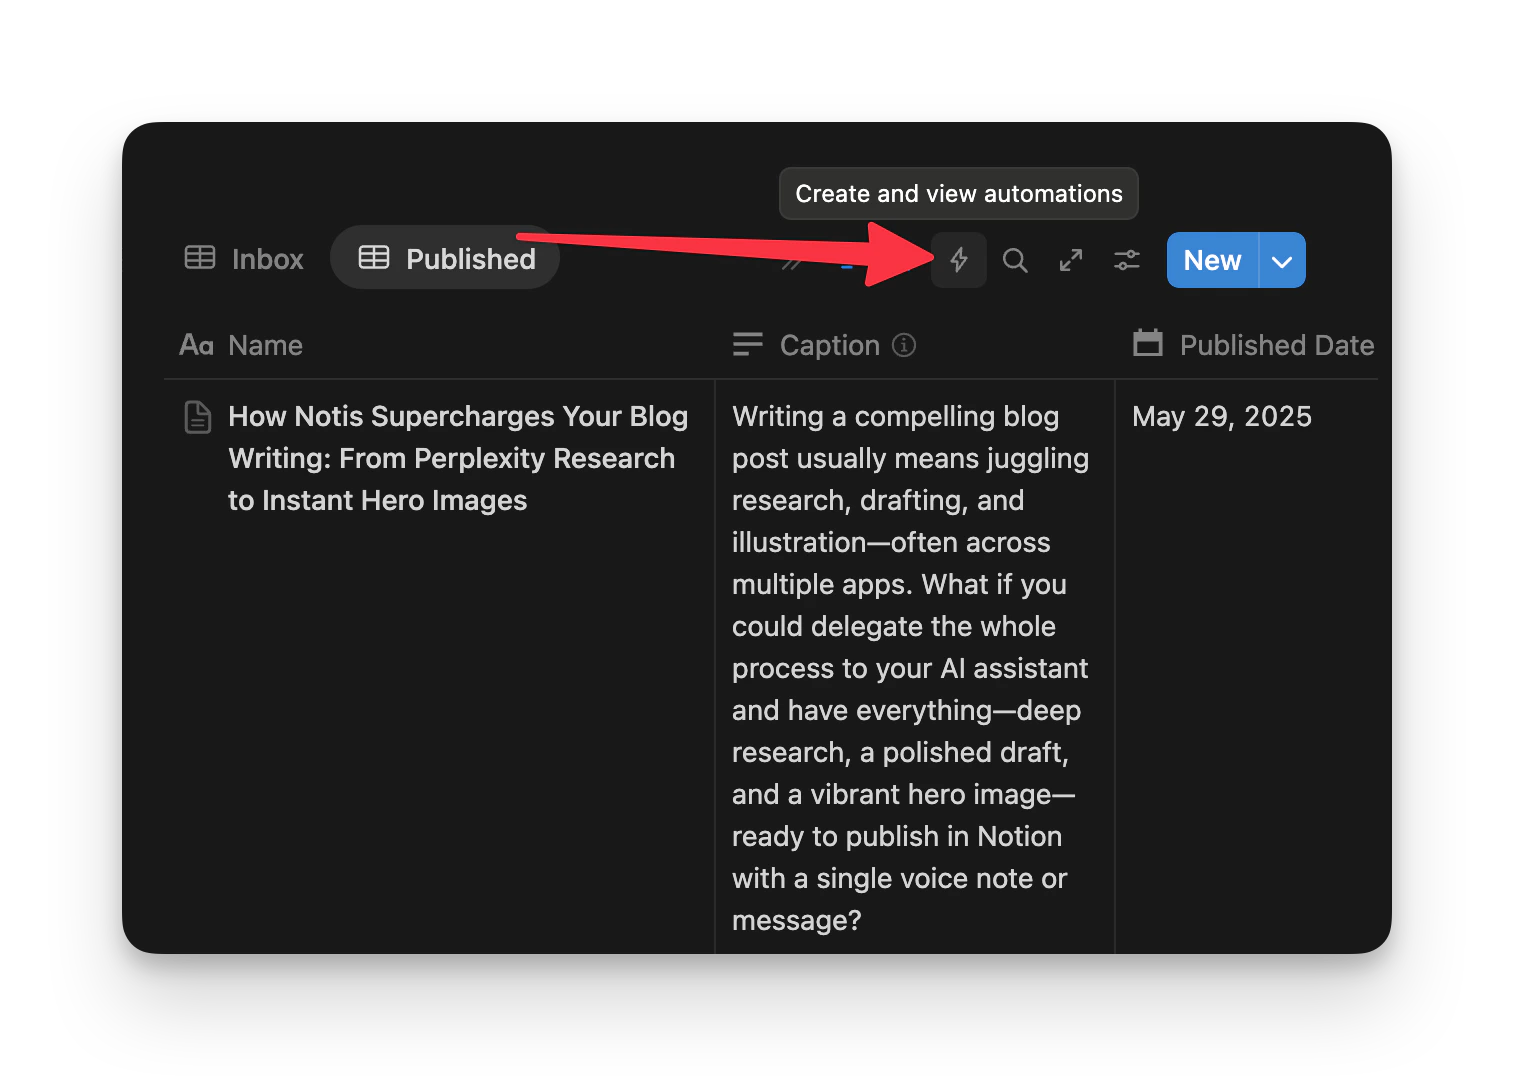
Open the database that should trigger Notis and click the automations icon in the top bar:
-
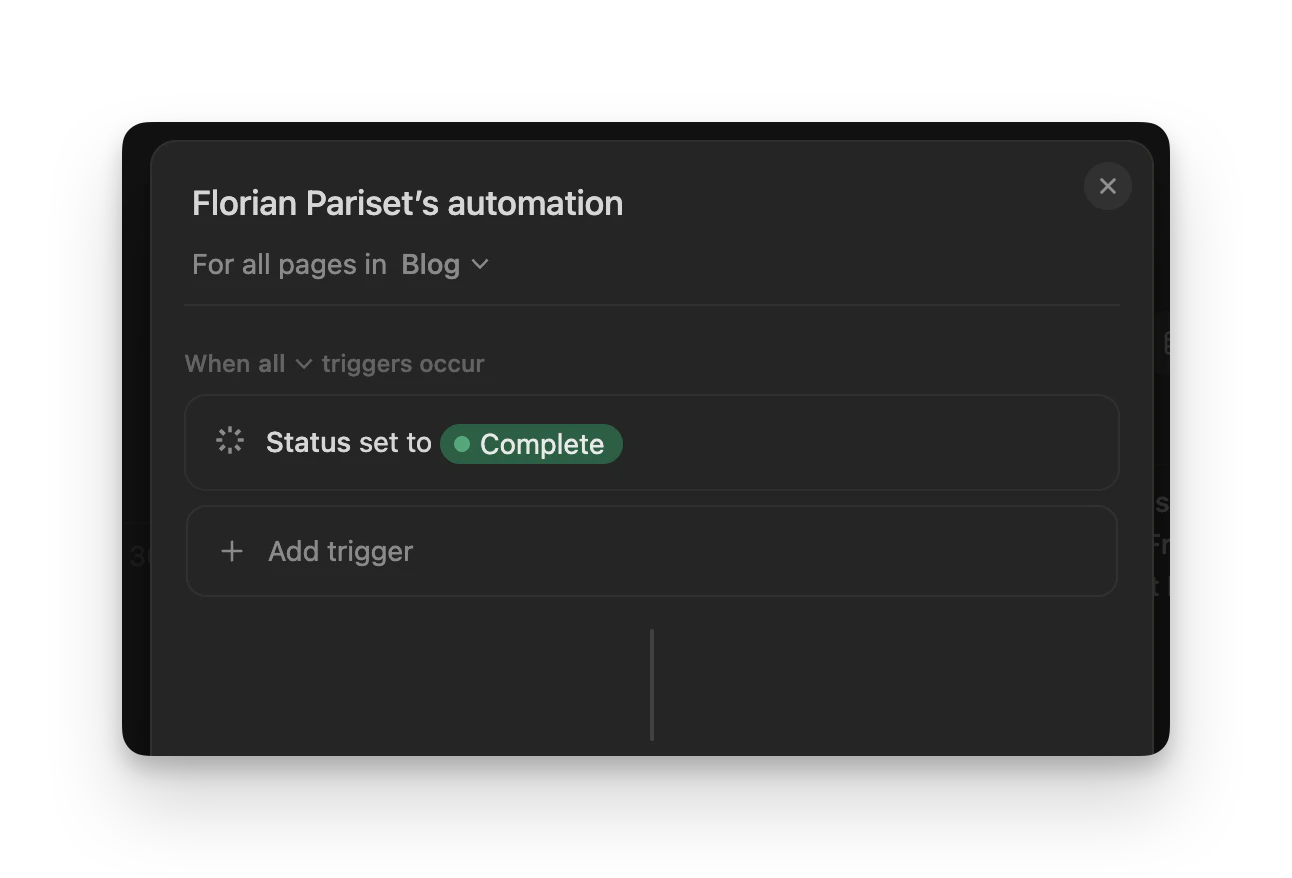
Configure your trigger in the When section — for example “Status set to Complete”:
-
In the Do section, choose Send webhook, paste your Notis automation’s webhook URL, and select the properties you want to pass along with your instructions:
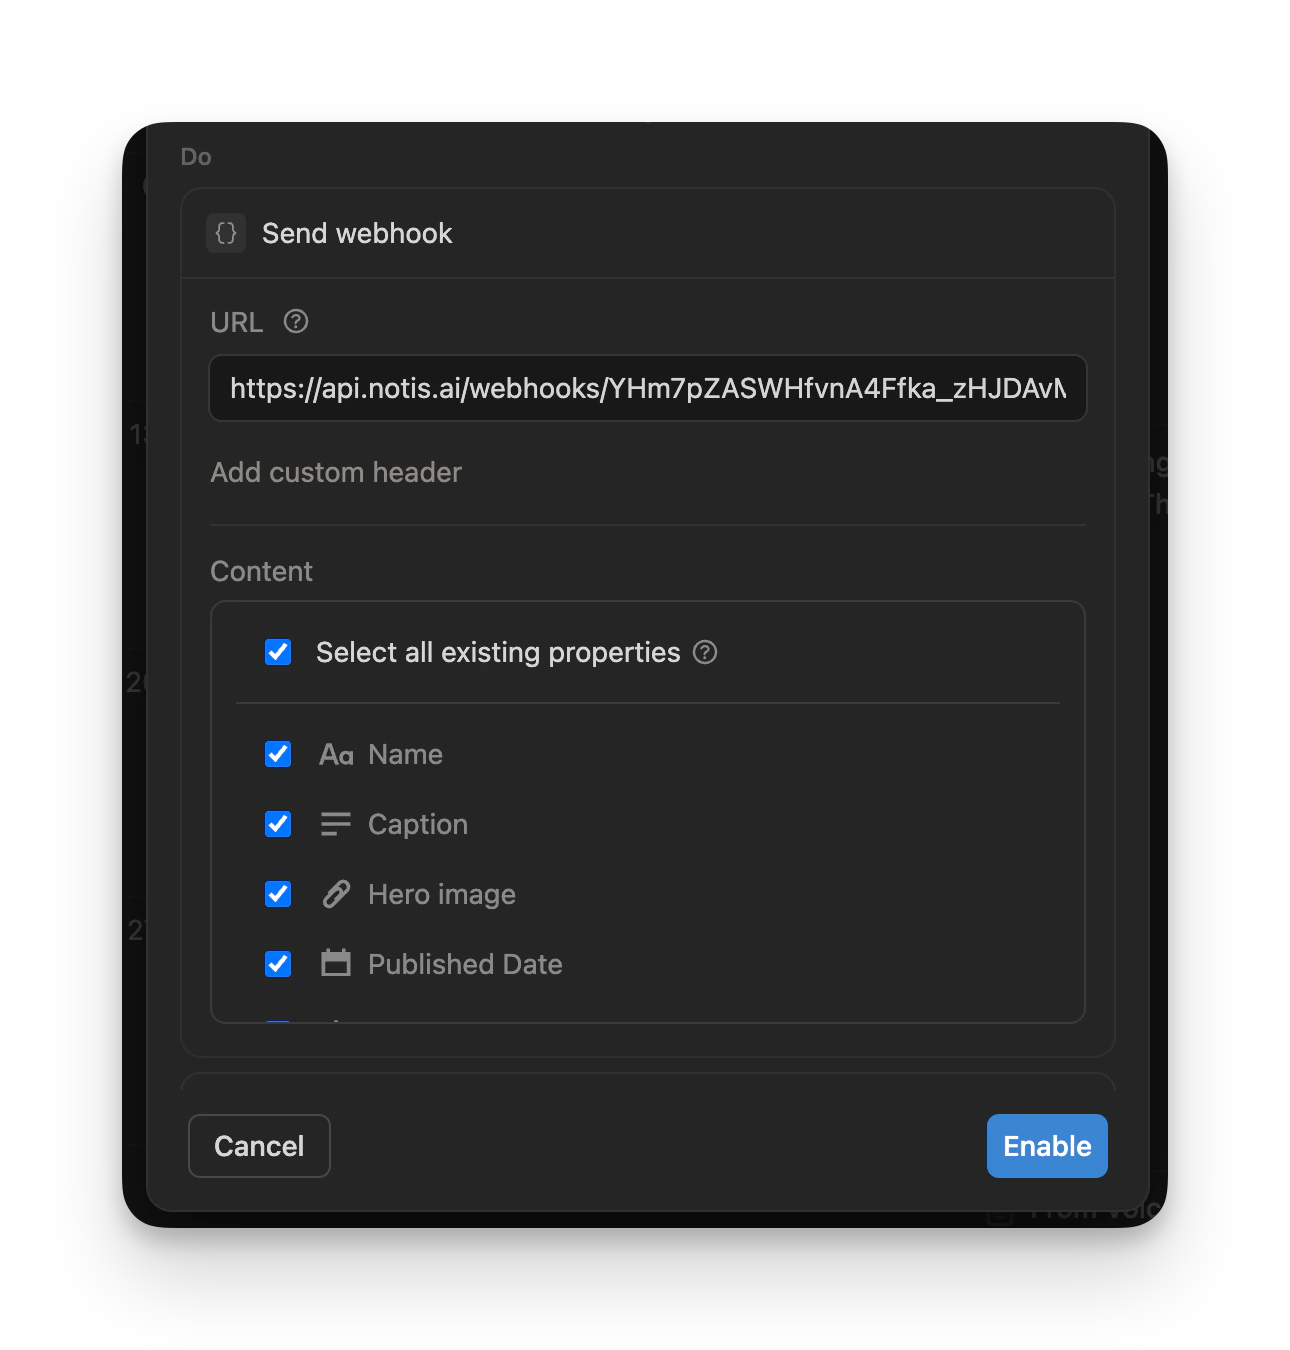
The selected properties are forwarded to Notis as the request body, so your automation prompt can reference them (“write a recap based on the page’s title and caption”, “use the published date to schedule the post”, and so on).
For the full list of trigger options, see the Notion webhook docs. The same webhook URL works with Zapier, Make, Pipedream, and any other automation platform.
Keep your webhook URLs strictly private — they have full editing access to your workspace. Webhooks don’t return any information, so they can’t be used to read your Notion workspace. For that, use the Notis API. What’s next